
Hello everyone.!!
Riswana here with you today.. This is my last DT post for this term at Mudra and I'm taking a break because of my upcoming exams.!! I would really miss being part of this wonderful team, it was sheer pleasure working with them & I learnt so much along the way.. I would like to thank each and everyone of them & a biiiggg special thanks to Varshitha for believing in me & showering loads of love all the time.
Most importantly I take this opportunity to thank you all, my wonderful friends, for giving me so much support, love & encouragement. You made the journey more memorable & worthwhile.!!
So without further ado, let's look at my projects for today, but a warning.!! This post is tooo longgg andddd picture heavyyyy.!! :D
Card 1:

This is a CAS card with the beautiful Zinnia stampset.! I totally adore this flower & I colored it with Zig CCRB pens.. I wanted it to be the focal point, so i kept the rest of the card Super simple..

Stampsets used:


Card 2:

This card is made using the most popular Botanical blooms stampset from Mudra.! This set is so versatile and the possibilities are endless.!
I wrote the sentiment with black fine liner pen & drew a circle around it with pencil. Then I stamped the leaves on it with memento inks (new sprout, bamboo leaves) & also stamped some fillers..
Stamped the blooms on a separate CS with memento inks (Angel pink, Rose bud, Lady bug) fussy cut them & mounted using foam squares...
Stamp set used:

Card 3:
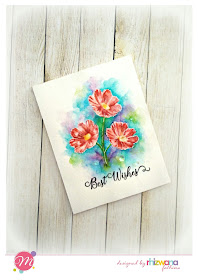
I stamped the daisy blooms with distress inks & used the layers as guide to do some watercoloring.. Then painted the background with distress inks & added some details with a white gel pen... Finished with few clear sequins..

Stampsets used:

Card 4:
 Here's a mixed media card.! Am totally in love with the Damask stampset.. I heat embossed with violet pearl EP & the shine is gorgeous in real life.. I've tried to capture a little bit here... Not sure if it is visible :P

Added tumbled glass & peacock feathers distress paints to color.. Also added some DI through a stencil to add more textures..
Distressed the edges of the layers & finally added the butterfly embellishment to finish off the card.!

Stampsets used:


Journal layout:
Art journalling has been my favorite part of crafting & it was because of journals that I was introduced to this wonderful world of crafts.. So i wanted to complete my post with a layout and Oh, I also have a pictorial for the same :) (told you the post was pic heavy.!!! ;))
Journaling is something more personal. There are no rules, no specific style, no restrictions.. It's a way of expressing yourslef freely & i love that freedom it provides.! However, learning a few tips & techniques will help us achieve the results we have visualised to become reality.. And Let's begin.! Here's the layout..

Background:
It's easy to start with a pattern paper as it gives lot of interest and texture.. I've used this gravel PP from Papericious "Naturals" collection..

Stick the PP on to the base & trim off the excess.

Give a light wash of grey color with Distress ink & water brush.

Use a sponge dauber to apply ink through a wall stencil. (I used both distress ink & archival ink). Add more ink where the wall and pathway meet to make the demarcation better.

Apply texture paste through a stencil using palette knife. After it dries, add a little amount of color to highlight some areas. (The Ranger texture paste is inkable i.e., it absorbs inks)

Focal points:
After the background is complete, it's time to make the focal points.
Stamp Ria on pattern papers with scripts (for more interest), colour with the medium of choice, paper piece the image & finally fussy cut it. I used Zig pens to color & also added some rhinestones for her necklace..

Draw some rough flower pots on brown PP, color & fussy cut. Stamp the filler flowers from Mudra Botanical blooms stampset on to cardstock. Fussy cut them & stick on the pot in layers.

Fussy cut some chit chat sentiments from PP & also some little banners (which i made into a signboard )
It's always better to arrange all the elements before sticking them & take a snapshot with camera to finalise the layout or make changes if necessary..

Finally stick all the elements in place using tacky glue, trim alomg the edges and you are done.!!!

More pics..


Stampsets used:

Mudra stamps are available for purchase in these Online stores
Hope you liked my projects and found the tutorial helpful.. Do lemme know your comments & feedback :)
Here are some of my personal favorite projects I did as Mudra DT member.. As this post was too lengthy i settled down to a collage :D

Once again thank you all soooooo much.!!! xoxo
Lots of love,
Rhiz.
Riswana here with you today.. This is my last DT post for this term at Mudra and I'm taking a break because of my upcoming exams.!! I would really miss being part of this wonderful team, it was sheer pleasure working with them & I learnt so much along the way.. I would like to thank each and everyone of them & a biiiggg special thanks to Varshitha for believing in me & showering loads of love all the time.
Most importantly I take this opportunity to thank you all, my wonderful friends, for giving me so much support, love & encouragement. You made the journey more memorable & worthwhile.!!
So without further ado, let's look at my projects for today, but a warning.!! This post is tooo longgg andddd picture heavyyyy.!! :D
Card 1:
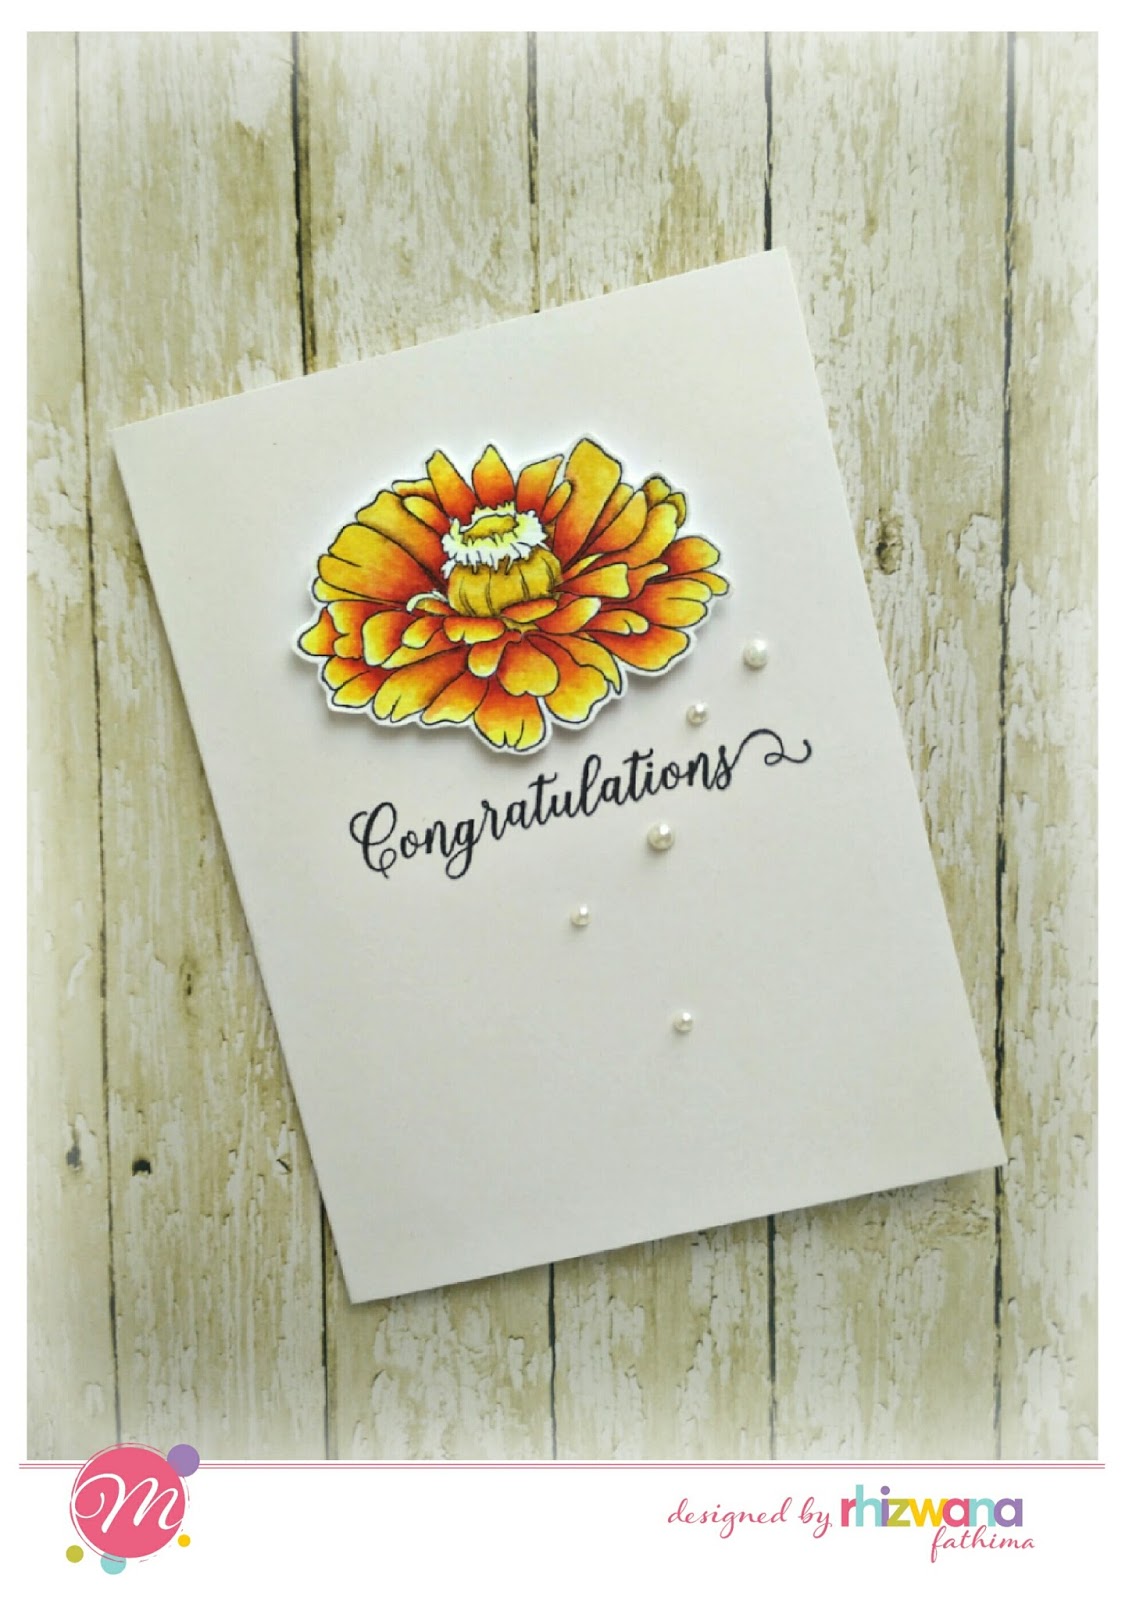
This is a CAS card with the beautiful Zinnia stampset.! I totally adore this flower & I colored it with Zig CCRB pens.. I wanted it to be the focal point, so i kept the rest of the card Super simple..

Stampsets used:


Card 2:

I wrote the sentiment with black fine liner pen & drew a circle around it with pencil. Then I stamped the leaves on it with memento inks (new sprout, bamboo leaves) & also stamped some fillers..
Stamped the blooms on a separate CS with memento inks (Angel pink, Rose bud, Lady bug) fussy cut them & mounted using foam squares...
Stamp set used:

Card 3:

I stamped the daisy blooms with distress inks & used the layers as guide to do some watercoloring.. Then painted the background with distress inks & added some details with a white gel pen... Finished with few clear sequins..

Stampsets used:

Card 4:


Added tumbled glass & peacock feathers distress paints to color.. Also added some DI through a stencil to add more textures..
Distressed the edges of the layers & finally added the butterfly embellishment to finish off the card.!

Stampsets used:


Journal layout:
Art journalling has been my favorite part of crafting & it was because of journals that I was introduced to this wonderful world of crafts.. So i wanted to complete my post with a layout and Oh, I also have a pictorial for the same :) (told you the post was pic heavy.!!! ;))
Journaling is something more personal. There are no rules, no specific style, no restrictions.. It's a way of expressing yourslef freely & i love that freedom it provides.! However, learning a few tips & techniques will help us achieve the results we have visualised to become reality.. And Let's begin.! Here's the layout..

Background:
It's easy to start with a pattern paper as it gives lot of interest and texture.. I've used this gravel PP from Papericious "Naturals" collection..

Stick the PP on to the base & trim off the excess.

Give a light wash of grey color with Distress ink & water brush.

Use a sponge dauber to apply ink through a wall stencil. (I used both distress ink & archival ink). Add more ink where the wall and pathway meet to make the demarcation better.

Apply texture paste through a stencil using palette knife. After it dries, add a little amount of color to highlight some areas. (The Ranger texture paste is inkable i.e., it absorbs inks)

Focal points:
After the background is complete, it's time to make the focal points.
Stamp Ria on pattern papers with scripts (for more interest), colour with the medium of choice, paper piece the image & finally fussy cut it. I used Zig pens to color & also added some rhinestones for her necklace..

Draw some rough flower pots on brown PP, color & fussy cut. Stamp the filler flowers from Mudra Botanical blooms stampset on to cardstock. Fussy cut them & stick on the pot in layers.

It's always better to arrange all the elements before sticking them & take a snapshot with camera to finalise the layout or make changes if necessary..

Finally stick all the elements in place using tacky glue, trim alomg the edges and you are done.!!!

More pics..


Stampsets used:

Mudra stamps are available for purchase in these Online stores
Hope you liked my projects and found the tutorial helpful.. Do lemme know your comments & feedback :)
Here are some of my personal favorite projects I did as Mudra DT member.. As this post was too lengthy i settled down to a collage :D

Once again thank you all soooooo much.!!! xoxo
Lots of love,
Rhiz.
Mind blowing creations Rhiz!!! the cards are so gorgeous. The journal layout tute is fantastic and inspiring. All your creations as DT are so gorgeous. Take care. xx
ReplyDeleteThank you so much Gv :) means a lot to me :) xoxo
DeleteAwesomeness packed post...Absolutely love each and every posts you shared in ur tenure... All the very Best Dear for ur future endeavors..Rock on!! Loads of Love and Hugs!!!
ReplyDeleteThank you so much dear :) It was wonderful being with you, my big pillar of support.! xoxo <3
DeleteI am totally floored by your amazing work Rhizwana.Each of your project is so gorgeous.Totally fabulous and innovative use if the stamps. I really loved each and every project you have shared here....Kudos on this excellent work💝
ReplyDeleteThank you so much dear Hussena :) feels gr8 to hear it from you <3
DeleteFabulous projects .I loved the CAS card and the journal layout just amazing n thanks for the tutorial too.gonna miss ur work.come back soon.U r always inspiring and all the very best for ur exams.
ReplyDeleteThanks a lot dearie :) am hoping to be back soon as well xoxo
DeleteSuper awesome creations..love each projects with colour details..my favourite is that art journal.. Specially that background.
ReplyDeleteThanks a lot dear Daksha :) am so glad you liked it :) <3
DeleteOmg super gorgeous cards. Amazing detailing. You are awesome, Rhiz. 😘
ReplyDeleteThank you so much dear Chirali :) xoxo <3
DeleteWhat a stunning work Riswana.....beautiful details....loved it
ReplyDeletexx
meena
Thank you so much dear :) glad to hear from you <3
DeleteAll of the are beautiful ! Superb coloring on zennia flower,the watercolored bg of Daisies looks magical.I loved the mixed media card too fab use of texture on a monochromatic card .Last but no least journal page with Ria is Awesome ,I always love how you build background around her .
ReplyDeleteWill miss your work ,all the Best for studies I am very sure you will Excell there too :)
Awww thank you so much for the lovely words Pooja :) Am so overwhelmed <3 xoxo
DeleteStunning creations Rhiz!! Love the journal and the Zinnia flower card the most!! All the best for your exams! Do come back with your amazing works :)
ReplyDeleteThank you so much dear :) glad you liked them <3 xoxo
DeleteAll your cards are beautiful,simple n elegant.Loved the art journal page.
ReplyDeleteThank you so much Kavitha :)
DeleteAll are beautiful Riz :) you totally rock with your coloring & mixed media skills <3
ReplyDeleteThank you so much dear :) <3
DeleteWow awesome projects ....
ReplyDeleteThanks....
ReplyDeleterubber stamp online
rubber stamp